
Tutorial
 Share on:
Intro to AWS WebSockets
You know that feeling when you go to a social media site, you publish something exciting, and sit there waiting for notifications to roll in as people like and comment on your post?
It’s the best.
It gives you immediate satisfaction over and over again. It sends little shots of dopamine through your system. It’s literally addicting.
And it’s all possible because of WebSockets.
What is a WebSocket?
At its simplest, a WebSocket is a direct line of communication between a client and server. Let’s use Twitter as our social media use case. A WebSocket connection is a two-way communication between the mobile app (or website) and the Twitter servers.
When somebody likes your post or retweets you, you want to be informed right then and there. So the servers use the direct line it has with you to push a notification to your phone. You get to know what happened as soon as it is happening.
Are they necessary? Technically no. But do they enhance the user experience and bring delight to your consumers? Absolutely.
Starting With AWS WebSockets
In AWS, a WebSocket is an API Gateway v2 resource. It supports the two-way communication between the client and server and allows you to setup custom routes.
Today we’re going to go through an example of a WebSocket written in a SAM template. I chose a SAM template because of how easy it is to deploy a serverless application directly into AWS without the need for 3rd party services.
To get started, navigate to the example repo and follow the deployment commands. If you have the AWS CLI and SAM CLI already installed on your machine, you should be up and running in less than 5 minutes!
WebSocket Routes
Like any API, a WebSocket has routes that trigger functionality. At a minimum, a WebSocket API must have two routes:
- $connect - What happens when a new direct line/connection is made from the client to the server
- $disconnect - What happens when a direct line/connection is removed between the client and the server
In our example, we have lambda functions that are executed at each one of these endpoints. We persist important connection information like the connectionId, ipAddress, and connectedAt time to have a little bit of metadata around who is establishing connections. This follows the basic Api Gateway -> Lambda -> DynamoDb pattern, which is a foundational building block in all of serverless development.
There are two additional routes in the example WebSocket API we just deployed.
- subscribe - Subscribes to receive push notifications when a particular entity is updated
- unsubscribe - Unsubscribes from push notifications for a particular entity
Most WebSocket examples found readily available on the internet are for broadcast notifications. These send notifications to every current connection. In a more real-world use case, a user would want to get updates when their user or an entity they are working on has been modified.
So our example provides a way to slim down WebSocket push notifications to specific entities on a connection by connection basis.
Testing the Connection
In order to test your WebSocket, you can grab the WebsocketUri output from your SAM deployment and connect to it in Postman. Postman is an application designed for everything around APIs, including connecting to WebSockets.
If you do serverless development and are not actively using a tool like Postman, I highly recommend it. I have written several blog posts about how it can improve developer experience and strengthen your deployment pipelines.
To connect to your new WebSocket in Postman, perform the following steps:
- Open the desktop app
- Select New -> WebSocket Request
- Enter the route from the output of your SAM deployment in the address field
- Click the
Headerstab and add theSec-WebSocket-Protocolheader with the valuewebsocket - Hit Connect
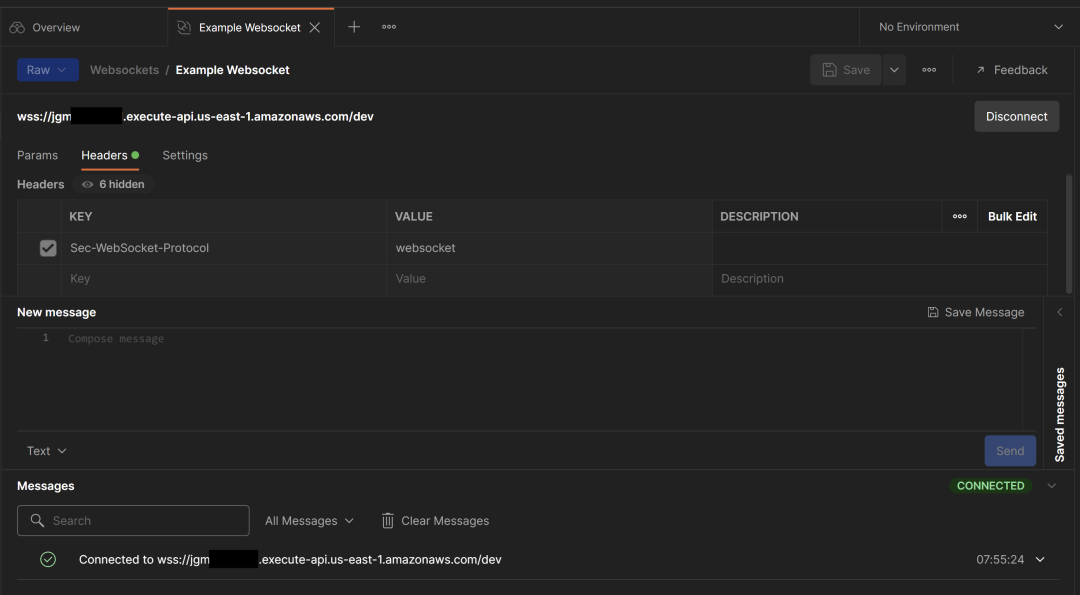 Connected to our WebSocket in Postman
When we want to subscribe or unsubscribe to updates, we must add a payload describing which route to take. With the API we built, the action property describes the route to take. To add a subscription, send a message in this format:
{
  "action": "subscribe",
  "entityId": "myTestEntityId"
}
Again, the action property is telling the API which route to take, and the entityId property is a parameter we’re passing into the subscribe lambda function deployed in the example project.
Now that we’re connected to the WebSocket, add this message to Postman and hit the Send button. It will hit the endpoint and save the subscription.
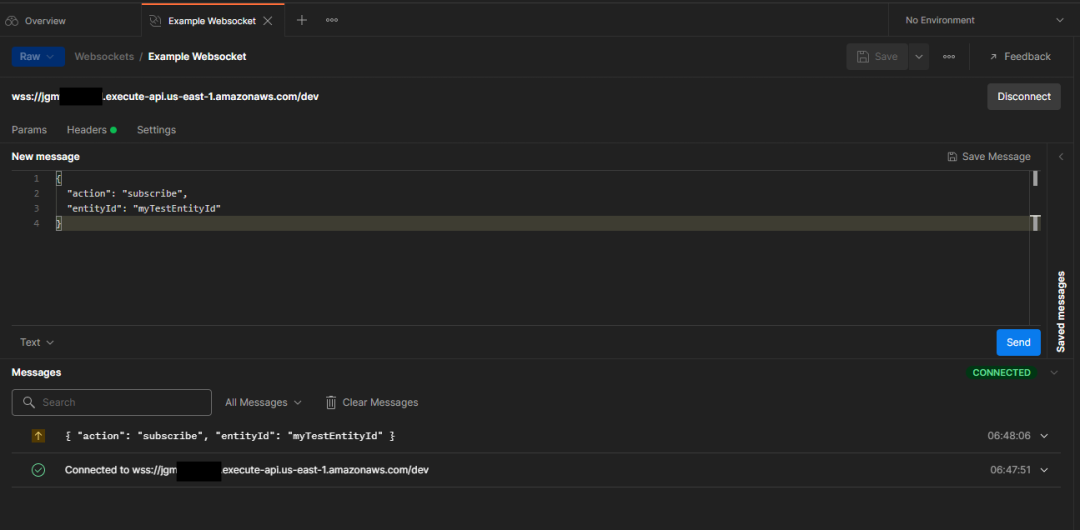 Adding a subscription for entity updates
With the connection and subscription, we’re ready to test our push notification!
Sending Push Notifications
The first thing we want to do is take a look at DynamoDB and verify our connection and subscription were saved. If you navigate to the websocket table in the DynamoDB console you will see there are two entries present: a connection entry and a subscription entry.
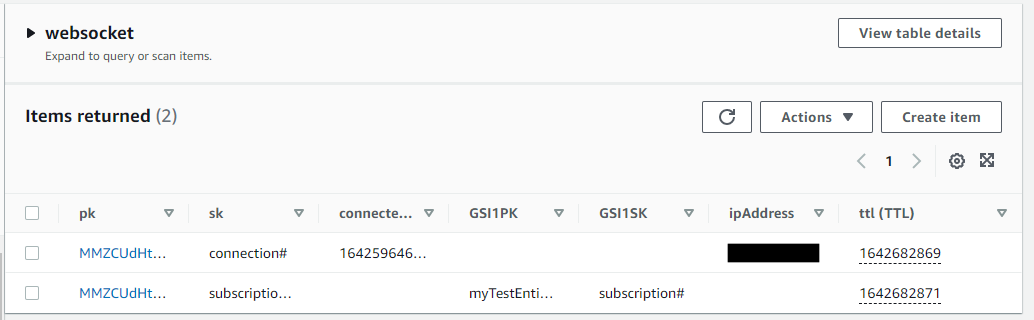 WebSocket connection and subscription in DynamoDB
Now that we’ve confirmed our connection and subscription, we can hop over to the EventBridge console to manually add a message.
In the example project we pushed into AWS, push notifications are triggered by an EventBridge event. The event is added to an SQS queue, which is popped by a lambda. The lambda function looks for all subscriptions for the entityId provided in the event and sends a push notification to all subscribers.
To manually send the event, click the Send Events button in the EventBridge console and add the following details as described in this screenshot
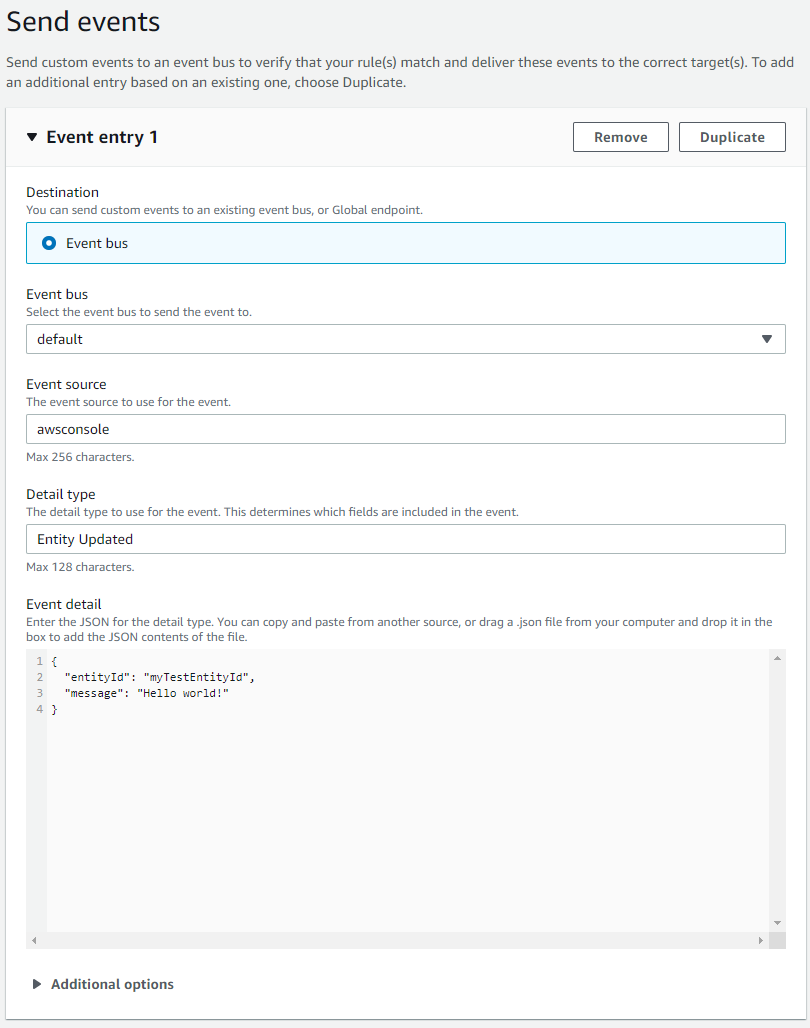 EventBridge event details
Once you hit the Send button, the notification process will trigger and a push will be sent to your connection in Postman.
If we flip back to Postman, we can see our Hello world message was received!
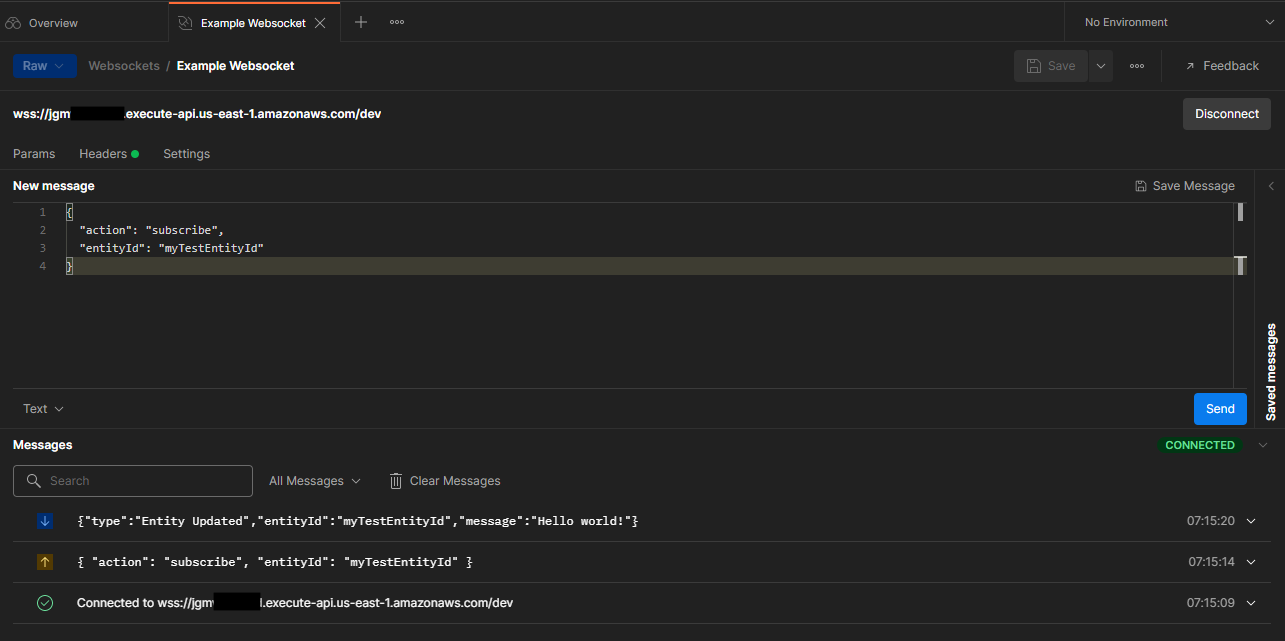 The push notification worked!
In a real world scenario, all subscribers of entity myTestEntityId would have received the same message we did. Super cool!
Next Steps
In today’s walkthrough, we learned about the pieces that make up a WebSocket and got access to a quick start with subscriptions and notifications.
Over the coming weeks, I will be creating posts in a WebSocket series describing ways to add authentication, custom domains, and defining events through an Async API spec.
Feel free to use this code however you like. It’s not quite production ready, it needs error handling states and retry mechanisms, but it’s almost there. It was intended to illustrate all the moving parts that come with an AWS WebSocket API.
There are many things to explore with WebSockets, and I will be here to walk you through it as I continue my adventure down an async 2022.
Update
The WebSocket series is complete. If you would like to continue on, please refer to the following:
Part One: Intro to WebSockets Part Two: Securing Your WebSocket Part Three: Documenting with Async API Spec Part Four: Adding User Notifications and Error Handling Part Five: Adding a Custom Domain
Happy coding!

Join the Ready, Set, Cloud Picks of the Week
Thank you for subscribing! Check your inbox to confirm.
View past issues. | Read the latest posts.