

Personal growth
 Share on:
Take the Leap! 10 Steps to Building Your Personal Blog With AWS + Hugo
They say you’re not cool unless you write. I don’t know who says it, but they do. I’m sure.
There are 30,000 writers on Medium, a whopping 2 million WordPress sites, and a total estimated 500 million blog sites. With roughly 1.7 billion websites today, blogs account for almost a third of the internet.
You see the numbers and decide you want to get in on the action. Why not? You’re an expert in something and there are people out there interested in what you have to say. That is a fact.
As a techie, you like fine grain control over your content. You don’t want your words edited or censored by posting on Medium. You want to tinker with the way your blog looks without digging into php and a smorgasbord of plugins if you went with Wordpress.
So it’s time to start your own blog!
What are my options?
Static site generators are about to be your new best friend.
If you have a blog that is strictly static content, meaning no loading from a bunch of external APIs, no dynamic content, etc… Hugo is a wonderful option. In fact, it’s what I used to build this blog!
Hugo will generate your website from some template html and md files. Written in GO, this framework is lightning fast and perfect for rendering data quickly.
What about hosting?
It’s incredibly easy to host a static site in 2020. There are many options out there for hosting like Netlify, BlueHost, and Hostinger that all put your blog on the internet. But we’re going with a an option that offers a little more control. We’re going to the powerhouse of the internet. We’re going with AWS.
AWS offers their Amplify service to provide hosting, domain management, code pipelines, test sites, and much more. Plus it is a pay for what you use model, which scales as you do.
 Photo by Miguel Bruna on Unsplash
Getting Started
I am going to walk you through all the steps I took to build this blog. I went from ground zero to full site up and running in about 6 hours - which included my nitpicking and discovery.
Below is a list of the 10 steps to get you going with your blog using Hugo and Amplify.
1. Pick Your Hugo Theme
One of the benefits of using Hugo are the hundreds of available themes to choose from. They give you the scaffolding and styling, you just provide the content.
You have your choice of using one of the 234 blog themes already made, or you could go about creating one yourself.
Take your time choosing your theme, you want to make sure you give your readers a great first impression. But don’t worry, if you end up wanting to change the theme down the road, it’s a simple process.
2. Setup Your Repository
You have to store your code somewhere. Personally, I like GitHub, but you can use whatever service you would like.
Create a new repository and clone it to your machine.
There are many guides on how to setup a new Hugo site with a theme, but I found this step by step guide the best to get the files where they needed to go.
Once you complete the guide above, do your initial commit and push!
3. Configure Amplify
Next we’re going to set up hosting through Amplify. Again, there are many tutorials out there on setting up a new site in Amplify, but I found this guide from Hugo to be the best for our use case.
Make sure you follow the steps in the Using a Newer Version of Hugo section at the bottom of the page. Almost all modern looking themes need a newer version of Hugo than what is included by default on the AWS build images.
After you follow that guide, you should have a stock Hugo site up and running in the cloud! You’ll see you have a url to your site, but it has a bunch of random numbers and letters. Nobody is going to discover your blog with a url like that.
Let’s take care it.
 Photo by Markus Winkler on Unsplash
4. Purchase Your Domain
A great blog needs a great name. This is your brand, and you need to take some time to figure out how you want to market yourself and your blog.
The hardest part about building a blog is coming up with the right name.
You want to make sure the name matches your focus. Are you trying to establish yourself as a thought leader in a niche? Try making the blog your name. Are you trying to create a space with a clear focus on something? Find a few words that summarize the focus area and string them together.
Once you come up with your domain, you can go to AWS Route53 to purchase it. We are going with Route53 because it has a direct integration with Amplify that makes it dead simple to set up.
With your domain name purchased, you can use the Amplify console to hook it up to your blog.
5. Get Fancy With a Custom Logo
Now that you have a blog and a domain, you might want to “make if official” with a logo. This step is totally optional, but recommended to help build your brand.
I don’t have an artistic bone in my body, so when I’m in the need for a logo I tend to gravitate toward freelancers. I’ve had great success with Fiverr and have used them multiple times for logos.
If you happen to be artistically inclined or know someone who is, take a stab at it yourself! It’s your site, after all!
After you get your new logo, all you have to do is replace the placeholder logo from your template and boom. Hello branding!
6. Move Your Existing Articles
I had been writing on Medium for a little over a year before I decided to make the jump to my own blog. Not wanting to lose out on all the content I created, I opted to copy the articles over to have everything in one place.
The tricky part was converting the articles from Medium’s format to markdown, but luckily I found an npm package called medium-2-md that does the conversion for you for all of your articles.
So if you have content on Medium, run medium-2-md, copy the converted files to your blog folder and the images to the static/images folder, and Hugo will pick them up automatically and publish your content on your site! Easy!
7. Setup Your Social Interactions
You want to draw people to your site, right? And you want to make sure they keep coming back? And sharing with friends? And engaging with your content?
The key to all this is to add social interactions. One of the easiest interactions you can add to your site is the Share on Facebook/Twitter/LinkedIn/Pinterest buttons.
Hugo already has a template for these buttons available on their site, so you can follow their instructions and get them added in minutes.
Another form of engagement is to add comments on your posts. Luckily, most - if not all - Hugo themes will already have comments wired up, you just have to add your Disqus short code. Disqus is a commenting service where people can authenticate with their social media accounts and post comments and reactions to your posts.
You don’t have to do any of the management of comments at all. Plus, their free tier is rock solid and is more than enough to get your blog off the ground.
Lastly, and probably most importantly, you want to make sure you add analytics to your site. Analytics will track how many people visit your site, how long they are there, if they visit other pages, even demographic information.
Once again, you can use a free service, Google Analytics to accomplish this for you. Even better, most Hugo templates already have a spot for this as well, you just have to put in your analytics id and you are all set.
8. Offer a Newsletter
There are many ways to engage with your followers, but none seem quite as personal as a newsletter.
A newsletter adds a touch of class to any blog, as it shows you reaching out to your followers directly, not just with a tweet or a happenstance “stumble upon” for your new article.
Newsletters provide a way for you to branch out as a writer, too. If most of your blog posts are long form writing, this could give you an opportunity to try out short blurbs. Or memes. Or offering relevant reference material.
Selfishly, getting people to sign up for your newsletter means you are building a tangible user base. You can directly quantify your reach by knowing how many people are subscribed to your newsletter.
Unsurprisingly, there are many services out there that offer bulk emailing. I decided to go with MailChimp as they have a decent free tier that will take a while to outgrow.
Any service you go with is going to offer you the same basic features - audience management, drag and drop email formatting, and scheduled emailing. This is all you need to get your feet off the ground and provide an exceptional experience for your followers!
With Mailchimp, you create a signup form on their site, they give you html, and you just copy and paste it into your site. Done!
9. Go Meta
You know when you paste a link in Facebook or Twitter and it pops up that little description with an image and the name of the site? That comes from meta tags.
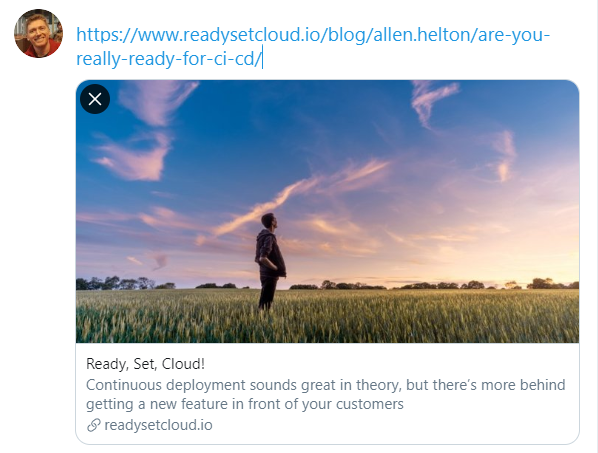
Meta details when posting a link to my CI/CD article
Another benefit you get from using Hugo as opposed to WordPress or other managed blog framework is that you get direct access to the html pages you’re producing. This means you can add as many meta tags as want.
There are a surprisingly large amount of meta tags you can add to an article. I was able to find the perfect SEO meta tags with hugo list, which shows exactly how to add every relevant tag.
If you want your site to be discoverable, this step is a must!
10. Create Content!
Your site is ready! You’ve brought in all your existing work, come up with your branding, set up social interactions, started a newsletter, and made your site discoverable.
Now it’s time to do the one thing you came here to do: blog!
Create content that you’re an expert in. Share recent experience. Build walkthroughs. Crosspost on other sites.
Promote your content. Social media is going to be your best friend. Post links, create branded hashtags, or send DMs. You know your content is great, help get it in front of the people that need to see it.
I hope you go and build your own site. It has been fun on many levels, and absolutely worth every second.


Previous
Are You Really Ready for CI/CD?
Join the Ready, Set, Cloud Picks of the Week
Thank you for subscribing! Check your inbox to confirm.
View past issues. | Read the latest posts.